

UPS Call Tags are used to provide a return shipping label, or call tag, that can be printed, emailed, or mailed to your customer.
Begin the process by creating a Miscellaneous Shipment.
After selecting 'Miscellaneous Shipment' from the pull down,
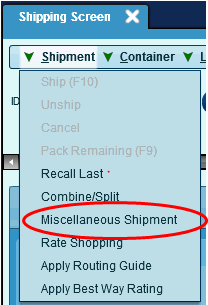
the following screen will appear:
From this screen you can select an existing address to ship to by clicking on the 'Find' button or ship to a new address by clicking on 'Use Address' button and entering a new address.
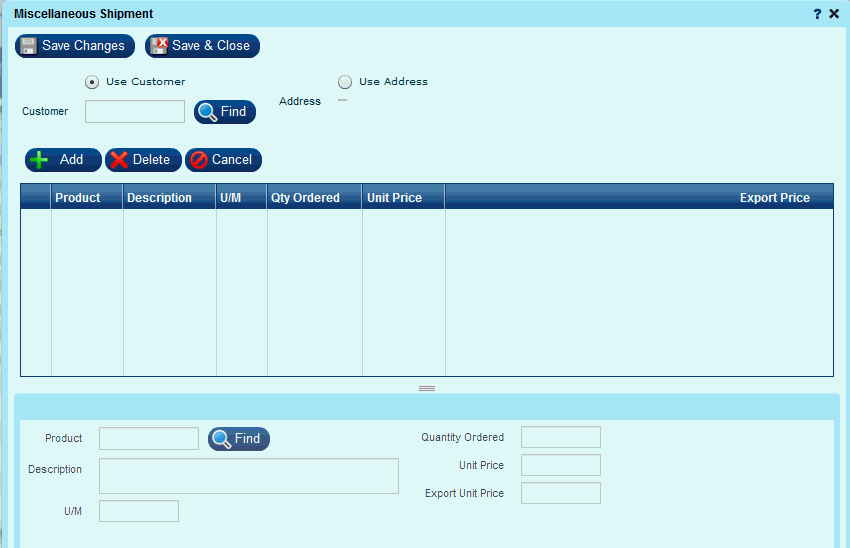
Using an existing customer:
If you know the CustomerID (Example: Dalton) you can enter it in the Customer field on the Miscellaneous Shipment screen and press enter or tab. Your customer’s information will be pulled into the screen as follows:

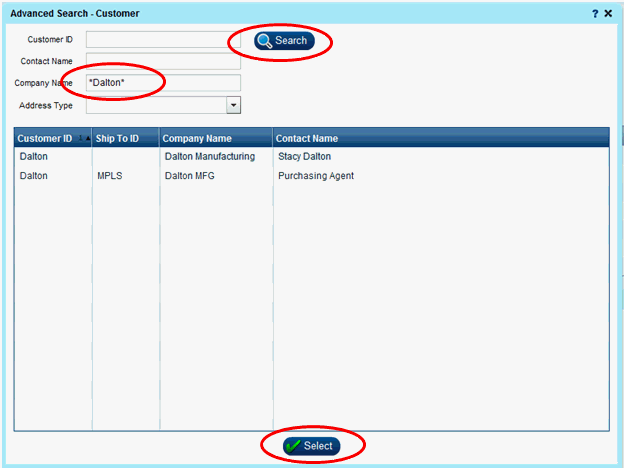
If you need to search for the customer or Ship To, click on the “Find” button next to the Customer field on the Miscellaneous Shipment Screen and the following 'Advanced Search - Customer' screen will appear.

Enter your customer search criteria and click “Search”. Your results will appear in the bottom grid. To select your Customer and pull the data into the Miscellaneous Shipment screen, either double click on the row in the grid or highlight the row and click the “Select” button at the bottom of the screen.
Adding a one-time address on the fly:
If you want to ship to an address but not add it as a customer, you can add the address into the Miscellaneous Shipment screen on the fly.
NOTE: This address is considered a 'One Time' address and will NOT be added to the Maintenance | Customer file. If the address you wish to send to will be used again, enter it in the Maintenance | Customer file.
Choose the radio button next to Use Address and the edit address icon will appear in the Address field.
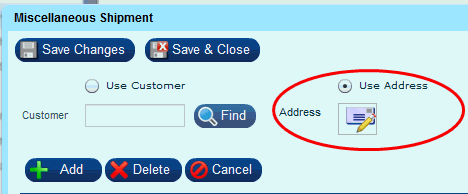
Click on the ![]() icon to display the Edit Address window.
icon to display the Edit Address window.
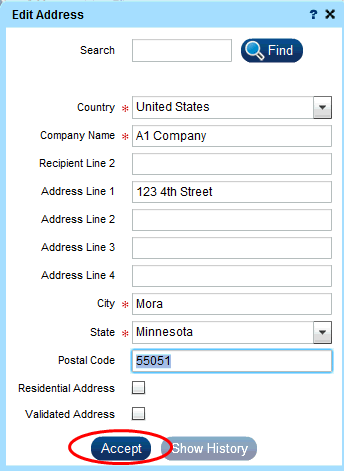
Input your one-time address information and click “Accept”.
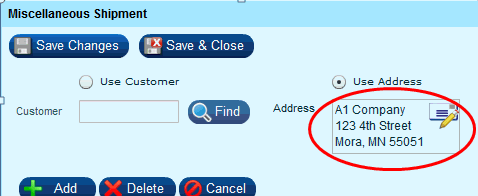
The address will now appear in the Miscellaneous Shipment Screen.
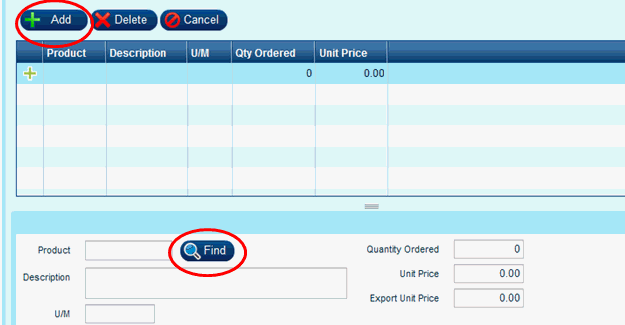
If you would like to add product to the shipment, click the “Add” button in the middle of the screen. A line will be added to the Product grid. You can enter the product information or search for the product by clicking on the “Find” button next to the Product field.
NOTE: You can create a Miscellaneous Shipment without adding any products.
Please see below for instructions on NON-PRODUCT SHIPMENTS.
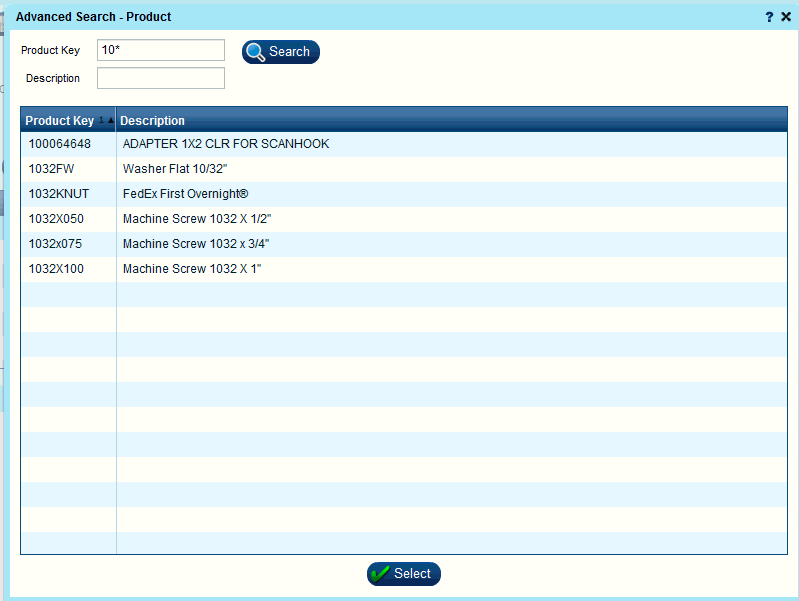
If you are searching for a Product and click “Find”, the following screen will appear:
Enter your search criteria and click “Search” or just click “Search to bring in all Products. Only 1000 records will appear at a time, so you may need to narrow your search criteria. To select your Product and pull the data into the Miscellaneous Shipment screen, either double click on the row in the grid or highlight the row and click the “Select” button at the bottom of the screen.
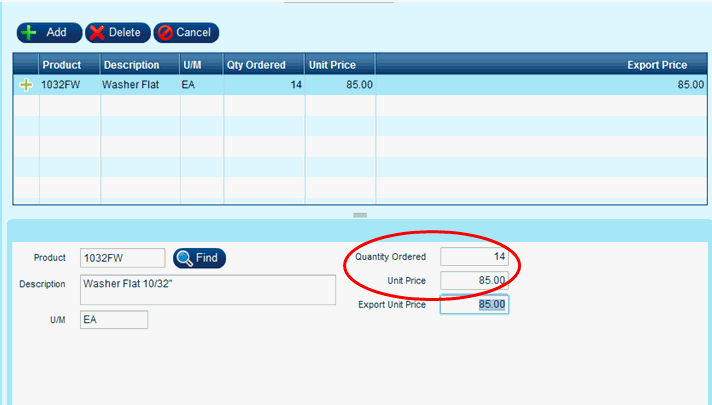
Enter your Quantity Ordered, Unit Price and Export Unit Price. If you need to add more products, repeat the Add Products Process.
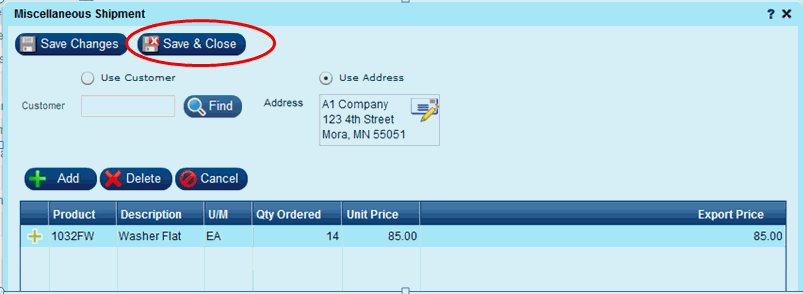
Click 'Save & Close' at the top of the screen to create the new Shipment record and return to the Shipping Screen.
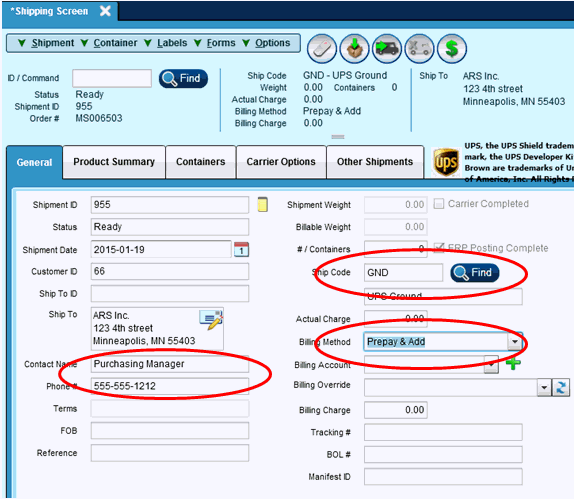
After clicking on Save & Close the following screen will appear:
If you have added the address on the fly, you will need to input a Contact Name and Phone #.
Input the Ship Code of the carrier you wish to use for the Call Tag by entering a corresponding ship code and pressing enter or tab, or by using the “Find” button next to the Ship Code field.
NOTE: Regardless of the Billing Method selected ALL Call Tag shipments are PrePay.
The next step is to create the container(s) that will be shipped.
From the Shipping Screen, move to the Containers tab.
There are 2 options for adding containers.
OPTION 1:
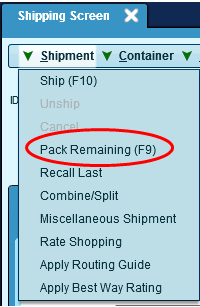
If you have added product(s) to the previous screen and you only have ONE container, you can simply click on the 'Pack Remaining' button or F9 key at the top of the screen to have all products added to the container. If you have defined a 'Default Container' it will default in this step. if you wish to change the default container or enter a container if none is defined, you must 'Open' the container, make your changes and 'Close' it again.
OR
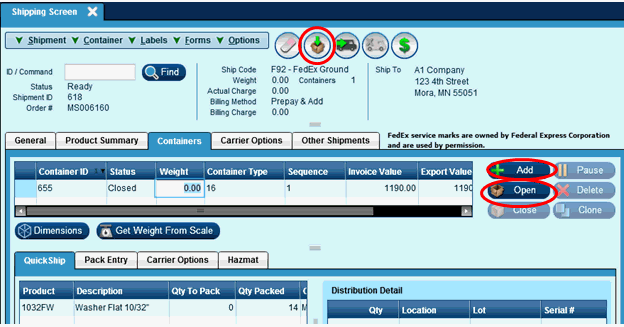
Either action will add the Product(s) to the carton.
You will then click in the 'Weight' field and enter the estimated weight of the return shipment.
NOTE: You can only add a weight manually when the container is in a closed status.
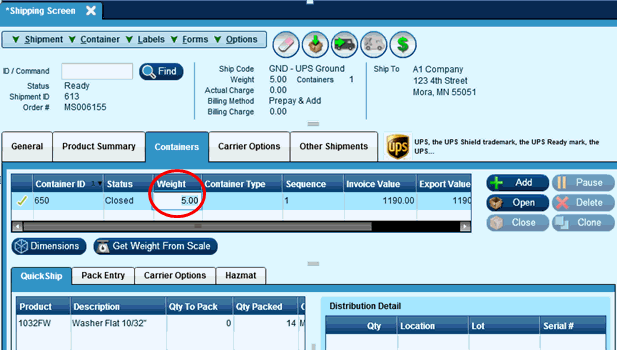
See section after Option 2 for remainder of process.
OPTION 2:
If you have added product(s) to the previous screen and have MULTIPLE containers, you will need to pack the product(s) in containers with the following steps:
From the Containers Tab click the “Add” button in the middle of the screen. A new line will be created in the containers grid. If you have set up a Default Container, it will default in. If you wish to change the Container Type, select from the drop down list.
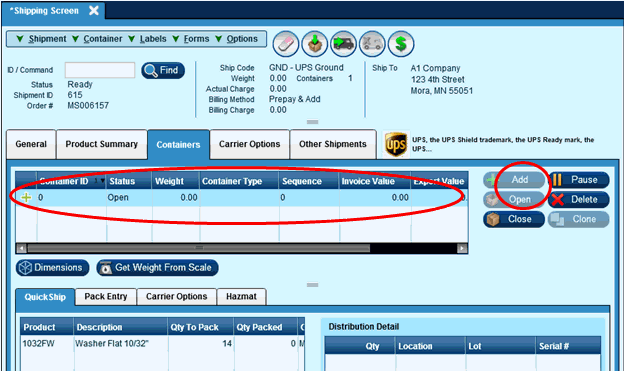
You will use the Pack Entry tab located at the bottom of the Containers tab to identify what product(s) are in each Container.
If "Prompt for Qty" is checked then you will be prompted for the quantity you want pack, otherwise it will default to packing a qty of 1 for the product selected.
Enter the product id in the 'Scan Product' field or click “Select”.
When you click “Select” the following screen will appear displaying the shipment lines on the shipment. Double click on the line you wish to pack.

If you had Prompt for Qty checked, the following screen will appear for you to enter the Qty.

Input the qty to pack and click Enter or Add. The Product will be added to that container.
After completing the items in the specific container, click “Close” to close the container.
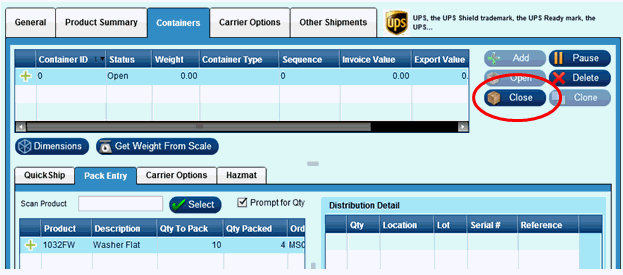
After container is closed, add an estimated weight to the container line in the grid.
NOTE: You can only add a weight manually when the container is in a closed status.
Repeat these steps until all the product is packed in the desire number of containers.
NON-PRODUCT SHIPMENTS:
From the Shipping Screen, move to the Containers tab.
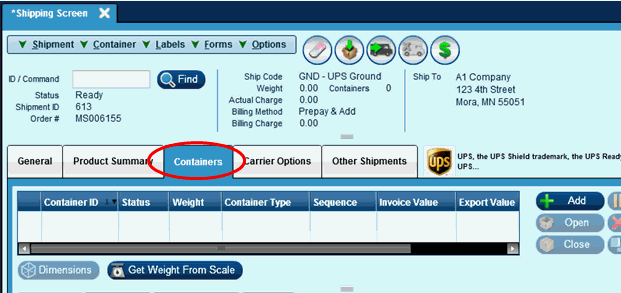
Click on the 'Add' button. This will create a new carton. If you have defined a 'Default Container' it will default in this step. if you wish to change the default container or enter a container if none is defined select the container type from the drop down.
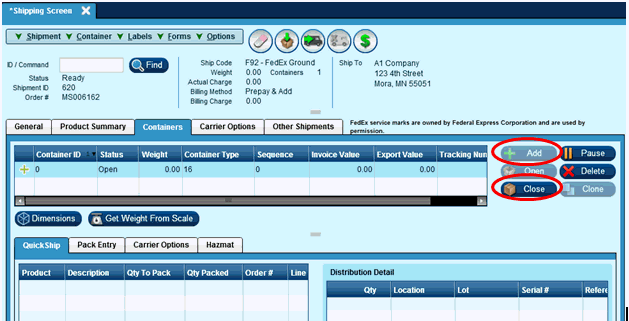
Upon selecting the 'Close' button you will receive the following warning:
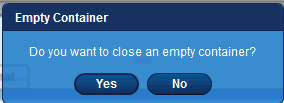
Select Yes to complete the container selection process.
After completing any Container Type information, click on the 'Close' button.
You will then click in the 'Weight' field and enter the appropriate weight.
NOTE: You can only add a weight manually when the container is in a closed status.
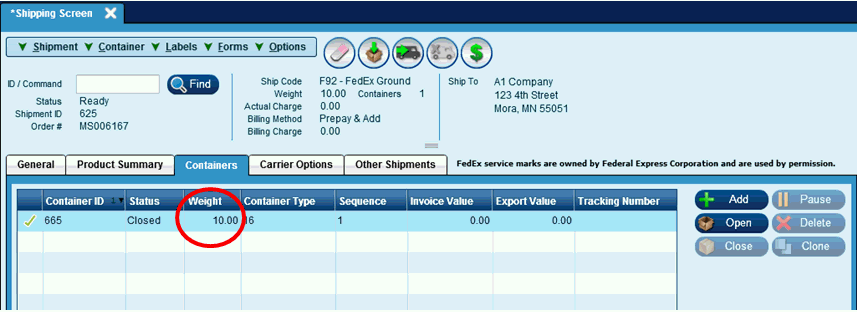
Repeat these steps until you have entered the desire number of containers.
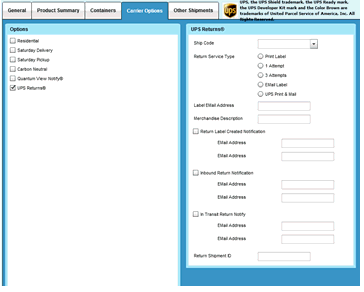
After weights have been entered, go to the Carrier Options tab. Depending on the carrier you have selected you will need to check the UPS Returns or FedEx Return box and fill in the appropriate information.
UPS:
FedEx:
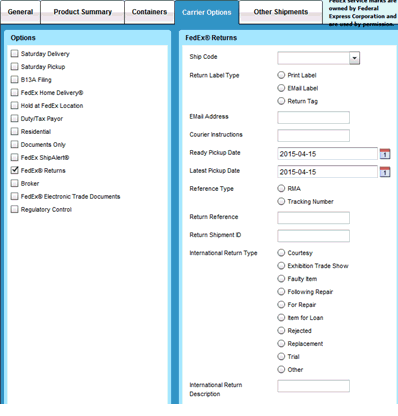
After the information has been entered, the final step is to process the shipment. If you have selected the Print Label option, a label will print. If you have selected the EMail label option, when you Close Carriers, the Carrier will EMail the Label to the address you have indicated. This may take up to 12 hours after the Close Carriers process.