
Carrier File Minimum entry requirement:
Administration | Carriers
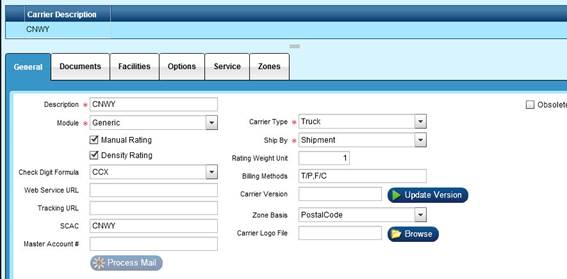
General Tab:
-Description
-Module = Generic
-Carrier Type = Truck
-Ship By = Shipment
-Zone Basis = Postal Code
Documents Tab (OPT):
-BOL
-Carrier Label
Facilities Tab:
General Tab:
-Facility
-Rate Basis = List
-Tracking #’s
Service Tab:
General:
-Description = Rate
LTL Training Outline:
Administration | Application Settings
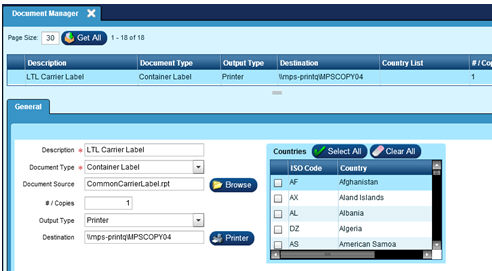
Maintenance | Document Manager
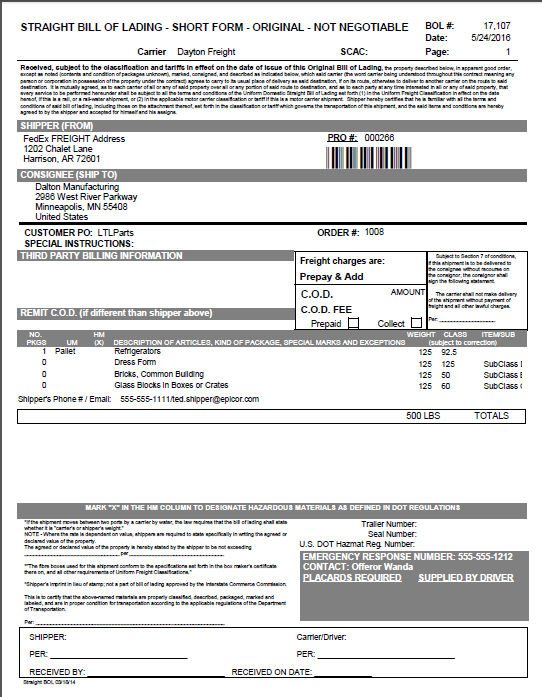
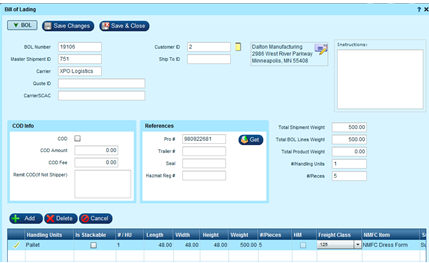
Example of Standard/Straight BOL Form
NOTE:
MUST HAVE WEIGHTS IN MANIFEST APPLICATION PRODUCT RECORD TO RATE NON-DENSITY SHIPMENTS.
FedEx FREIGHT is NOT setup as an LTL Carrier. FedEx FREIGHT setup is done in the FedEx PARCEL setup. See the Procedure Section for FedEx FREIGHT Priority and Economy. FedEx FREIGHT DOES require weights on the Manifest Products to get accurate rates from FedEx.
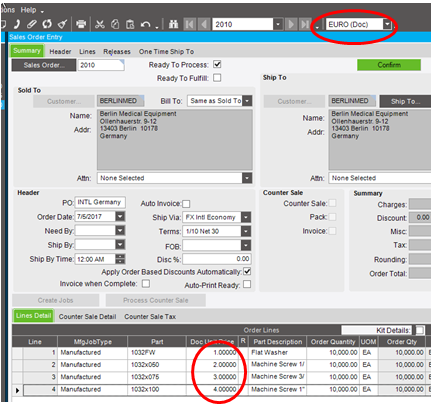
Process Epicor ERP LTL Shipment
Review Manifest Bill of Lading Processing
Administration | Application Settings
|
InsiteManifest |
AutomatedBOLCreation |
Leave Blank unless NOT for ALL. |
If true, the BOL will automatically print for all truck carrier shipments; even if the carriers PRO# is blank. |
Maintenance | Document Manager
Add:
BOL = BOL.rpt
VIC’S BOL = BOL_VICS.rpt OR BOL_VICS_with_PCS.rpt
LTL Label = CommonCarrierLabel.rpt
NOTE: CutePDF Writer is NOT a valid option.

Example of Standard/Straight BOL Form


Administration | Carrier - LTL
Administration | Carrier - LTL | General Tab
Density Rating:
This flag is used for LTL Carriers using the density calculation to determine the BOL Class. If using the part records BOL class or using FAK for the BOL Class, do not check this box.
The calculation for determining BOL class by density:
Density Level = (Weight / (Length X Width X Height) / 1728)).
Density Level Freight Class
Less than 1 400
1 but less than 2 300
2 but less than 4 250
4 but less than 6 150
6 but less than 8 125
8 but less than 10 100
10 but less than 12 92.5
12 but less than 15 85
15 but less than 22.5 70
22.5 but less than 30 65
Greater than 30 60
Example of Density Calculation
1 Container
1 - 48X48X40 @ 450 pounds
(450 / ((48X48X40) / 1728)) = 8.4375
Freight Class 100
3 Containers
1 - 48X48X40 @ 400 pounds
1 - 40X40X40 @ 400 pounds
1 - 36X36X36 @ 400 pounds
(1200 / (((48X48X40)+(40X40X40)+(36X36X36)) / 1728)) = 10.22405
Freight Class 92.5
WebSite for Single pallet or multiple pallets with same dims.
https://www.freight101.com/template.php?target=help/classcalc.tpl
WebSite for multiple pallet shipments of different dims.
http://www.freightboss.com/density_calculator.shtml
NOTE: This functionality is available for BOTH Customer Shipment Entry AND Master Pack logic.
Epicor ERP/Epicor Manifest Application Packaging Codes/Container Types need to be setup to reflect the appropriate pallet/container dimensions.
Epicor Manifest Application will use the values passed in the EpicorRequest <PackInfo><Length>,<Width>, <Height> and <Weight> segments to calculate density ((Lenght X Width X Height)/1728) / weight.
Once the BOL Class is determined from the above calculation; the standard rating calculation will be made. i.e. search the shippers rate table to determine the freight amount.
Check Digit Formula:
This pull down is used for LTL Carriers. If the LTL uses a check digit when assigning their PRO#'s, you will need to insure that the carriers check digit formula is available. This field is used in conjunction with the beginning and ending Tracking# from the Facilities Tab.
Currently there are 4 standard Check Digit Formulas available:
CCX - enter 8 digits on the Facilities Tab; and the system will add the Check Digit at time of Freighting.
RDWY - enter 9 digits on the Facilities Tab; and the system will add the Check Digit at time of Freighting.
USF - enter 10 digits on the Facilities Tab; and the system will add the Check Digit at time of Freighting.
YRC - enter 11 digits on the Facilities Tab; and the system will add the Check Digit at time of Freighting.
Web Service URL:
This field is used for Parcel Carriers. See Parcel Carrier section for setup.
Tracking URL:
This field is used for Parcel Carriers. See Parcel Carrier section for setup.
SCAC:
This field defines the optional SCAC code for the carrier.
The Standard Carrier Alpha Code (SCAC) is a unique code used to identify transportation companies. It is typically two to four alphabetic letters long. It was developed by the National Motor Freight Traffic Association in the 1960s to help the transportation industry computerize data and records
Administration | LTL - Carrier | Documents Tab:
The Documents tab on the Carriers screen is where carrier specific reports and labels will be setup. This will mostly be used for Manifest Reports, UPS Power of Attorney or BOL forms. If the user would like to print different report templates for each carrier’s manifest report then the rpt templates would be assigned to the carrier in this screen. If you are using the same report template for all carrier’s manifest reports, then that template can simply be setup in the Document Manager screen with a printer and # of copies assigned to each Facility in Workstations | Documents.
The Document Type triggers when the document will print, but there is no Output Type on this page. The printer information will come from the document type that is included at Workstations | Documents. See above Document Manager Section.
Administration | Carrier - LTL | Facilities Tab
Setup each facility with the appropriate information for each carrier.
NOTE: Requires a Service Setup to successfully Freight a Shipment.
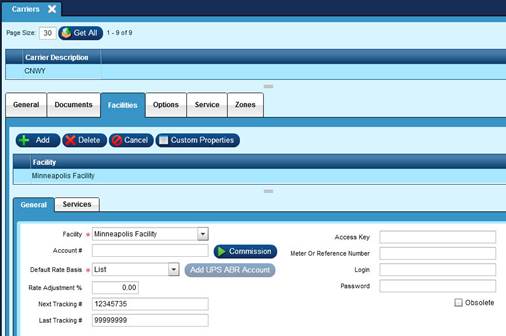
Carrier | Facilities | General Tab:
Facility:
This drop down is used to select the facilities the carrier is authorized for. If the Facility is not in this list, the carrier cannot be used at that Facility.
Account #:
This field is informational only for LTL Carriers.
Default Rate Basis:
This pull down is used to define the Default Rate Basis. For LTL Carriers it is recommended 'List' is used.
Rate Adjustment %:
Define a positive or negative percentage in which to adjust the returned rate.
Next Tracking #:
Enter the next LTL tracking number or tracking number base for the carrier.
NOTE: This is optionally used in conjunction with the 'Check Digit Formula' from the General Tab.
Last Tracking #:
Enter the last possible LTL tracking number or tracking number base for the carrier.
Access Key:
Not used for LTL.
Meter or Reference Number:
Not used for LTL.
Login:
Not used for LTL.
Password:
Not used for LTL.
Administration | Carrier | Facilities | Services Tab:
Use this tab to asses additional charges to specific Carrier Services.
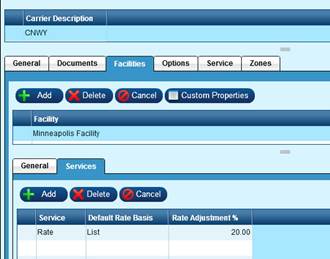
Service:
Identify the specific Service that you wish to adjust the Shipping rate for.
Default Rate Basis:
This field is currently not used. The rate basis will be from the Facilities | General Tab.
Rate Adjustment:
Enter a positive or negative percentage in which to adjust the returned rate for the specific Service selected. This value overrides the Carrier/Facility value and is added to any charges from the Shipping Charges Scheme.
Administration | Carrier - LTL | Options Tab:
Not used in the LTL setup.
Administration | Carrier - LTL | Service Tab:
This tab is used to assign specific information offered by a Carrier. For LTL this information will be the Rates for that LTL.
NOTE: A service MUST be setup up in order to successfully freight a shipment.
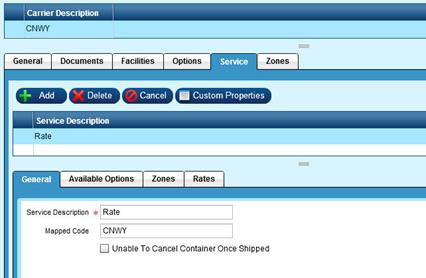
Carrier | Service | General Tab:
NOTE: You will need to setup a Service to process shipments and Import Rates.
Service Description:
This field is used to define the name/extended description of the service.
Mapped Code:
This field is used by carriers to identify the specific Service being used.
Unable to Cancel Container once shipped:
Not currently used in Epicor Manifest Application.
Carrier | Service | Zones Tab:
This tab is used when LTL Rates are being imported. This will be used with LTL Carriers only and typically will be populated from a flat file.
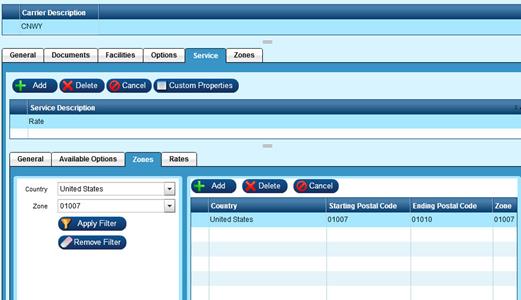
Country:
Select the country the zones will be defined for.
Zone:
The unique zone for the postal code range.
Starting Postal Code:
This field reflects the starting postal code, district, or country that will be used for rating.
Ending Postal Code:
This field reflects the ending postal code, district, or country that will be used for rating.
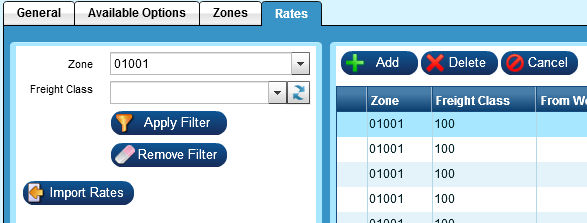
Carrier | Service | Rates Tab:
Use the Import Rates button to import LTL .csv file rates. See below for import procedure.
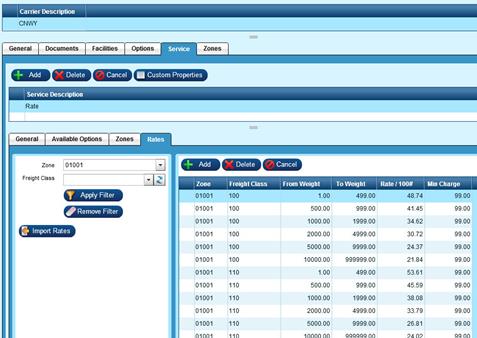
Zone:
Identifies the zone rate values correspond to. This zone must match a zone in the zone table.
Freight Class:
NMFC Freight Class rate values correspond to.
From Weight:
Minimum weight for this rate value.
To Weight:
Maximum weight for this rate value.
Rate / 100#:
Value charged per 100 pounds.
Min Charge:
The minimum charge for this freight weight range.
Administration |Carrier | Service | Zones Tab:
Zone tab is NOT currently used in Epicor Manifest Application.

Use this icon to import rates for specific LTL carriers.
Select the Import Rates icon.
The Import Rates window will open.
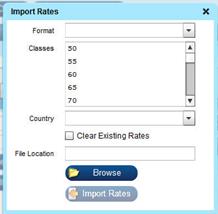
Format:
Select the Import Type drop-down arrow to select the type of file you will be using for the Ship Code. Epicor Manifest recommends using Insite By Zip. See below for import structure information.
- Czar Lite
- Czar Lite Flat
- Insite By Zip
- Insite By State
Classes:
Highlight all of the Freight Classes that you will be loading data for from your carrier.
Note: You must set up Freight Classes in Maintenance | BOL Classes prior to importing your carrier’s file.
Country:
Select the country the import records relate to.
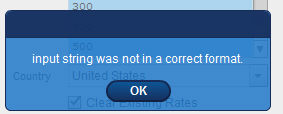
Clear Existing Rates:
Check this box if your import should over write any existing records.
File Location:
Browse to find the file you wish to import.
INFORMATION REGARDING IMPORT FILE STRUCTURE:
To use the Epicor Manifest Application formatted imports, the data must be in a comma-separated file and the columns must match up exactly to the definition below.
Most of the data received from trucking carriers will be available in Microsoft Excel format. It is suggested to re-organize the spreadsheet within Excel – removing or adding columns, moving columns to match the format and/or conditioning any data that may be needed. Once the data is in the proper format, save the spreadsheet as a CSV file.
Excel will prompt you about formatting issues as you do this as shown below:
Simply click the Yes button to accept and create the file – the .csv version of the rating table will be the one that is imported.
NOTE: You need to remove any header lines in the file. If you have not deleted any header lines you will get the following error message:
ZIPCODE TABLE FORMATTING:
Column Field Description
1 - DestZipLow Lowest zip code in the destination’s range of zip codes
2 - DestZipHi Highest zip code in the destination’s range of zip codes
3 - Class This is freight class that the rates are tied to
4 - Min Minimum charge for this destination
5 - L5C Rate per 100#, < 500 lbs
6 - M5C Rate per 100#, 501 – 999 lbs
7 - M1M Rate per 100#, 1000-1999 lbs
8 - M2M Rate per 100#, 2000-4999 lbs
9 - M5M Rate per 100#, 5000-9999 lbs
10 - M10M Rate per 100#, > 10,000 lbs
STATE TABLE FORMATTING:
Column Field Description
1 - State Valid 2-character US state code
2 - Class This is freight class that the rates are tied to
3 - Min Minimum charge for this destination
4 - L5C Rate per 100#, < 500 lbs
5 - M5C Rate per 100#, 501 – 999 lbs
6 - M1M Rate per 100#, 1000-1999 lbs
7 - M2M Rate per 100#, 2000-4999 lbs
8 - M10M Rate per 100#, 5000-9999 lbs
9 - M5M Rate per 100#, > 10,000 lbs
The Ship Codes Module is used to map ship codes from the ERP to the proper carrier/service in Epicor Manifest Application. Additionally, this module is used to help determine if the ship code is used in rate shopping or has specific default services. The Carrier Options that are linked to the mapped carrier service will appear on the Default Shipment Options and/or Default Container Options tabs.
You can enter the ShipCodes manually or if Integration has been setup, you can select the 'Refresh Ship Codes' ![]() from the upper right icon list to import codes from Epicor ERP. You will still need to map the codes but the Code and Description fields will be populated.
from the upper right icon list to import codes from Epicor ERP. You will still need to map the codes but the Code and Description fields will be populated.
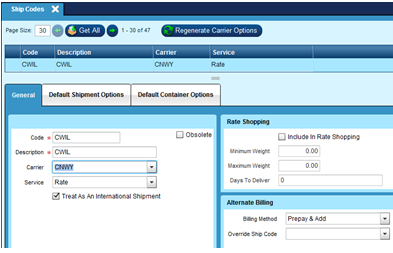
General Pane:
Code:
This field is used to define the ShipCode. The code MUST match the ShipCode for Epicor ERP.
Description:
Allows for further description or an extended name of the ship code.
Carrier:
This drop down is used to select the Carrier associated with the ship code.
Service:
Use this drop down to map the Carrier Service to the shipcode.
Treat As An International Shipment:
Not used in Epicor Manifest Application.
Rate Shopping Pane:
If Rate Shopping will be used, select the “Include in Rate Shopping” box and input the min and max weight. The ship code will only be included in rate shopping if the shipment weight is within these parameters.
Include in Rate Shopping:
Determines if the carrier service represented by this ship code should be used for comparison rate shopping.
Minimum Weight:
Sets the minimum weight required to be included in a rate shopping request.
Maximum Weight:
Sets the maximum weight required to be included in a rate shopping request.
Days To Deliver:
Indicates the number of days it will take the carrier to deliver a shipment using this service. e.g. UPS Next Day Air service would be "1" day.
Alternate Billing Pane:
Billing Method:
NOT USED in Epicor Manifest Application.
Override Ship Code:
NOT USED in Epicor Manifest Application.
Used to manually set up values.
Used to manually set up values.
This module is used to define and manage containers associated with a specific container type to define various characteristics.
NOTE: For multiple Facilities, user must logon with credentials for each Facility and add the appropriate Container Types for that Facility.
‘Container Type’ is how you assign a Carrier and map the container to a specific carrier package.
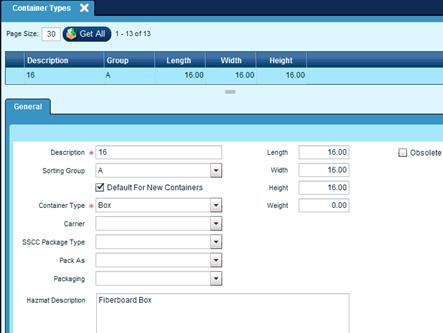
General Tab:
Description:
This required field is used to define the name of the container. This entry MUST match the 'Packaging Type' code from Epicor ERP.
Sorting Group:
This drop down is used to define the sorting group of the container. This value is used to group together Container Types.
The containers listed with Sorting Group A will be displayed first in the Shipping Screen Containers grid.
Default For New Containers:
If “Default For New Containers” is checked, all new containers will be default this container type in the shipping screen. If freighting from Epicor ERP, this will be the default container for the shipment if no container is selected or mapped in Epicor ERP.
NOTE: Only one Container Type is allowed to be the default.
Container Type:
This drop down field is used to identify the specific type of container. Generic containers are user defined. See packaging for specific Carrier packaging.
This drop down is populated from the Administration | Miscellaneous Codes |
ContainerType Codes:
- Bag
- Box
- CS
- Drum
- Envelope
- Pallet
Length:
This field is used to define the physical length of the container.
Width:
This field is used to define the physical width of the container.
Height:
This field is used to define the physical height of the container.
Weight:
This field is used to define the physical weight of the container.
Input the container’s dimensions and tare weight if required.
The BOL Classes file is used to define, create, or maintain Bill of Lading classification information. A BOL Classification is linked to the specific Item. When shipped, if the Carrier does not use Density Rating, this BOL Class will be used when creating the Bill of Lading form to identify the class of commodity that is being shipped.
BOL Class does NOT pull from Epicor ERP. Users MUST enter Classes in this screen and then update the Maintenance | Products with each items BOL Class.
NOTE:If you are NOT using Manual Rating for your carriers you are NOT required to enter BOL Classes in the Product Record. You can manually type in what classes you want on the BOL form.
A BOL Class ‘FAK’ (Freight All Kinds) can be defined to be used when an individual item has not specific BOL Class assigned, or when a case contains items with multiple BOL Classes.
NOTE: The FAK will be entered on the product record.

General Tab:
BOL Class:
This required user defined field is used to identify the BOL Class. If using Item or Sub-Class, it is suggested that this field is used to assist users in identifying the Product’s BOL Class.
Description:
This required user defined field used to describe the BOL Class. This value will be used to print on forms.
Freight Class:
This required drop down is used to define the actual freight class that will be used for the BOL Class to determine freight charges.
This drop down is populated from the Administration | Miscellaneous Codes | FreightClass Codes.
VALID CODES:
50
55
60
65
70
77.5
85
92.5
100
110
125
150
175
200
250
300
400
500
NMFC Item:
This field is optionally used to identify the NMFC Item code for a product.
Sub Class:
This field is optionally used to identify the NMFC subclassification for the product.
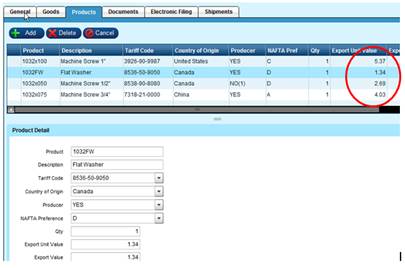
This file is used to define product/part attributes. Most of the data populated in this module will come from the Epicor ERP directly.

General Tab:
Unit Weight:
This field is used to define the weight of the product. If using and LTL carrier and the carrier is set to NOT use Density Rating, this is the product weight that will be used for calculating freight regardless of the weight sent from Epicor ERP.
BOL Class:
This drop down is used to select the BOL Class that is associated with the product. The BOL Class list can be modified in the Maintenance | BOL Classes table.
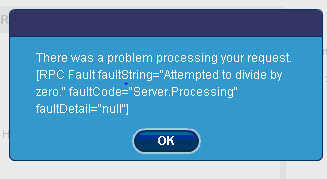
If no container type entered:
Attempted to divide by zero........
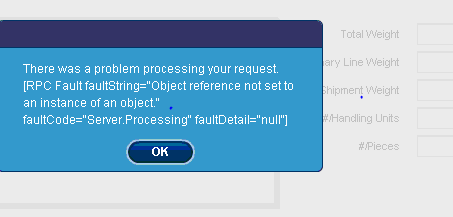
If no BOL Class on the part and carrier is not Density Rated.
Object reference not set to an instance.........
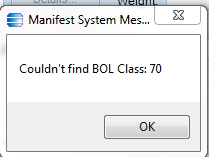
If class is in rating file that is imported and the class is not set up in the BOL Class files you will get:
Couldn't find BOL Class.........
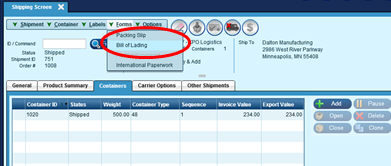
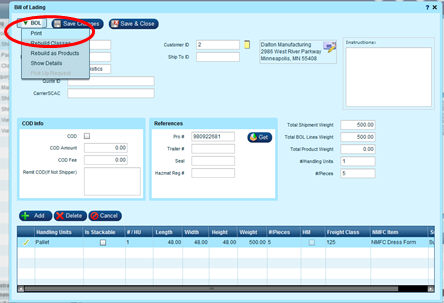
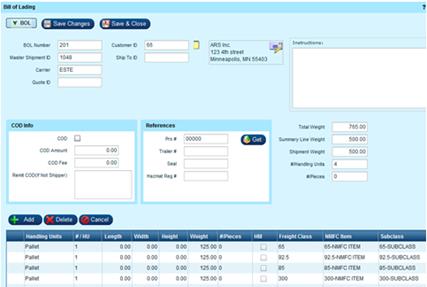
In Epicor Manifest Application, select the shipment; use the pull down menu for Forms | Bill
of Lading, modify any information necessary, select the BOL pull down and select Print.
Combining Multiple Pack ID’s in one BOL:
CURRENTLY NOT AVAILABLE IN MANIFEST
Identify the shipments you wish to combine by the Shipment ID.
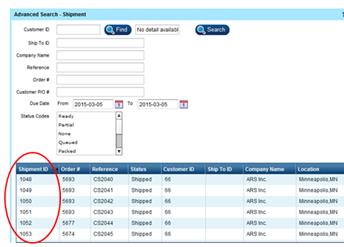
Select one of the shipments to ‘Add’ the other shipments to.
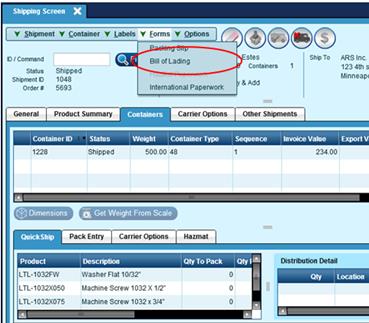
Use the Forms | BOL menu pull down to create the BOL form.
Once created, close the BOL Form window.
‘UnShip’ the shipment.

Once ‘Unshipped’ go to the ‘Other Shipments’ tab:
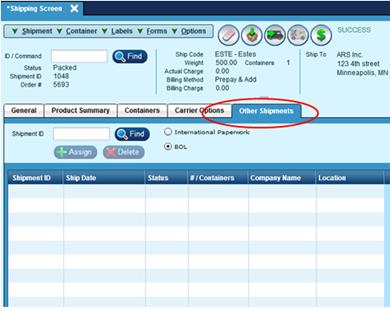
Enter the Shipment ID of the shipment you wish to add to the BOL by typing in the ID.
NOTE: the Find Icon is currently not functioning. Once the ID is selected, use the +Assign icon to add the shipment. Repeat the process until all shipments are added.
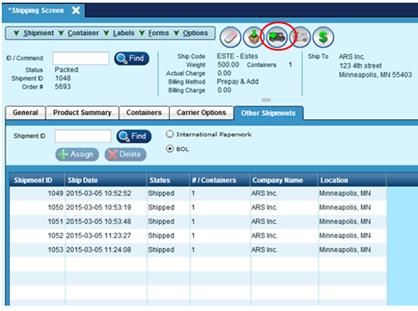
Once all shipments are added, Ship the shipment.
You can then use the Forms | Bill of Lading pull down to create the new BOL with the additional items on it. Adjust any values as needed.
Print the combined form.