
The Workstations File is designed to setup workstations and configure the associated printer and options. While a facility is a physical location from where orders are shipped, the workstation is an area within that facility where the shipper will conduct his or her work. At least one workstation is required and should have been setup during installation.
Users will login to a specific workstation at a certain facility in the application. The current workstation is displayed in the status bar at the bottom of the screen. Double clicking on the workstation will display a drop down field to allow the user to change the workstation and/or facility. Once the new workstation is selected a Save button will appear next to the drop down list. Save must be clicked to implement the changes. If the user does not wish to change his/her workstation, the Cancel button next to the drop down can be used to hide the drop down list.
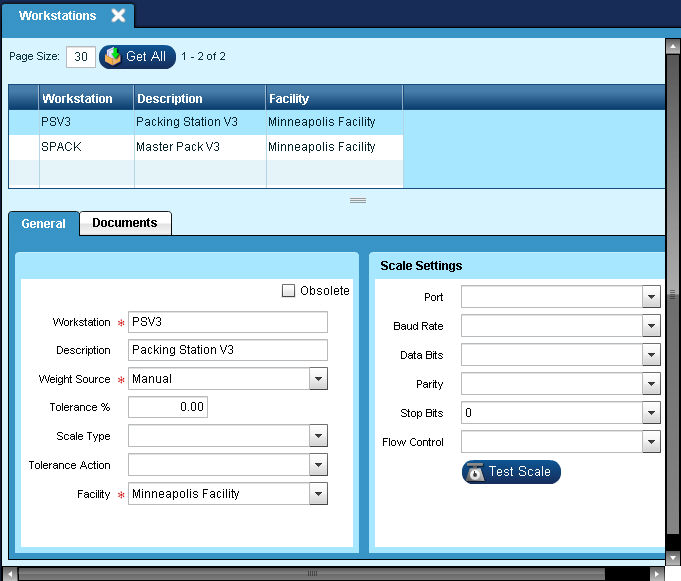
Workstation:
The workstation name MUST match the Epicor ERP Workstation Station ID.
Description:
This field is used to define an extended descriptive name of the workstation.
Weight Source:
Epicor Manifest Application customers will use the Manual option for Weight Source due to the weight of the container will be retrieved from Epicor ERP.
Tolerance %:
Not currently used in Epicor Manifest Application.
Scale Type:
Not currently used in Epicor Manifest Application.
Tolerance Action:
Not currently used in Epicor Manifest Application.
Facility:
The Facility this workstation is assigned to.
Scale Settings:
Not currently used inEpicor Manifest Application.
Not currently used in Epicor Manifest Application.
See Document Manager Section for additional information.
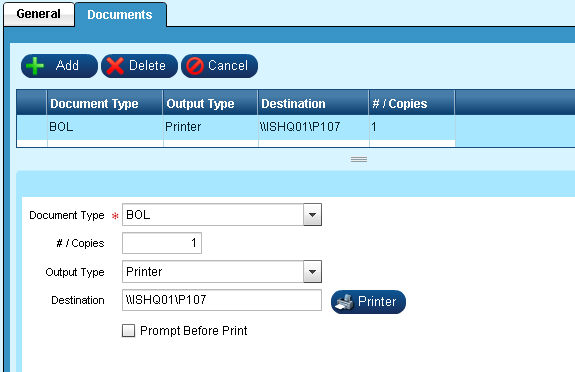
The Documents tab on the Workstations screen is where you can setup individual printers and the # of copies to print for each workstation. If the user only has one workstation, the document types from that screen do not need to be setup here unless they have a need for a separate printer distinction.
Carriers such as UPS, FedEx, USPS - Endicia, Ontrac and DHL generate their own carrier documents and send the label or report string back to Epicor Manifest in the shipment reply XML. Those carriers will only need to have the Carrier Label and Carrier Form document types included in the Workstation | Documents to determine the specified printer and # of copies.
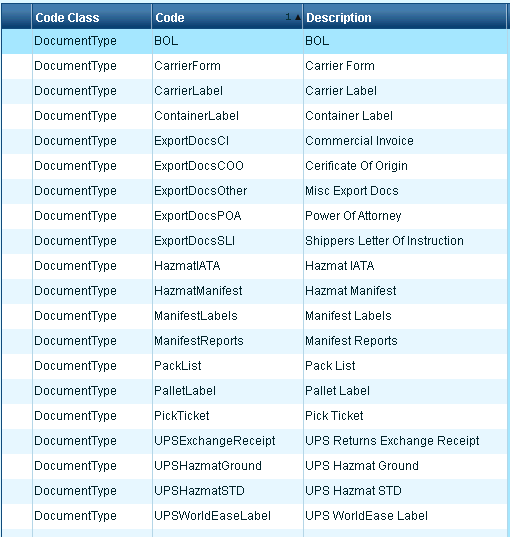
The options of this drop down are populated by Administration | Miscellaneous Codes | Addl Info screen.
NOTE: A carrier label is a shipping label. A carrier form is a form that could be sent back by a carrier i.e. a Hazmat or Export forms from FedEx. The two types allow the user to choose a laser printer for the form and label printer for the label.
To add or delete a workstation document or cancel a change to that record, select the desired workstation in the top grid and use the ![]() buttons on the Documents tab.
buttons on the Documents tab.
Document Type:
Links the document records from the other screens to the printer or # of copies for that workstation. The Workstation printer overrides the Document Manager printer.
If The document type you need is not in pull down list, go to Miscellaneous Codes and add file name to Addl Info field for the form needed.
# / Copies:
This field is used to define the default number of copies to print of the selected document. This field is only valid for printer based outputs. The # of copies setting on this screen will override the Document Manager settings. If # of copies = 0, the information will be pulled from the Document Manager setting.
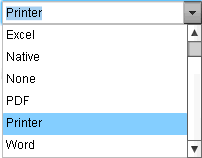
Output Type:
The Output Type settings on this screen will override the Document Manager settings. If no Output Type is assigned, then the information will be pulled from the Document Manager. NOTE: Printer is only current valid setting.
Destination:
Defines the printer or other context based on the output type such as a directory location to place a file. Clicking the Printer button will display the available printers. Label printer name should not contain any spaces and if the printer shared name is different be sure to input the shared name in this field.
Prompt Before Print:
Only used for Hazmat paperwork where a special form needs to be loaded into the printer prior to printing. When this box is checked, the user will be prompted to add the media and then select OK to print the report.
NOTE:
If you have issues with the label printers, ZPL vs EPL, you can use the Custom Properties to set appropriate file types.

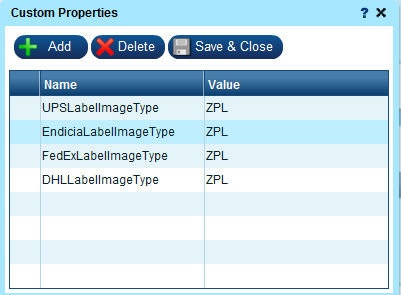
| Name | Value |
| DHLLabelImageType | ZPL, EPL, PNG |
|
EndiciaLabelImageType |
ZPL, EPL, PNG |
| FedExLabelImageType | ZPL, EPL, PNG |
| UPSLabelImageType | ZPL, EPL, PNG |
After the Epicor Freight Service is installed; add Workstation to Epicor ERP Manifest information.
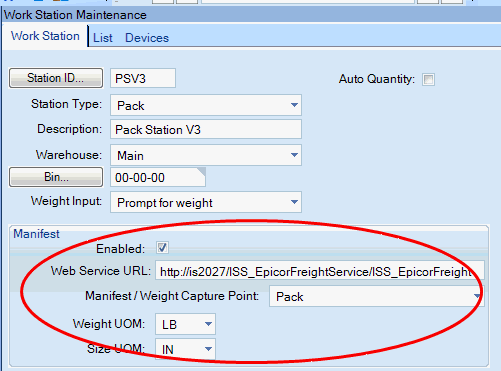
Station ID MUST match the Workstation Name in Epicor Manifest Application.
Assign Station Type to 'Pack'.
Add a Description, Warehouse and Bin information.
Select appropriate Weight Input:
'Prompt for Weight' - User will manually enter weight.
'Get Weight from Part configuration' - Weight will be calculated from part file.
'Get Weight from Scale' - A scale is attached and each package will be weighed.
Check the Enabled box.
Web Service URL:
Below is an example of an entry.
http://[IP ADDRESS where Web Server is Installed]/EpicorFreightService/EpicorFreightService.svc
Manifest/Weight Capture Point:
'Pack' for Customer Shipment Entry Orders or 'MasterPack' for Master Pack Orders.
Weight UOM: LB for US accounts.
Size UOM: IN for US accounts.