
The Carrier file is used to define the carriers at a global level. Default and Global Information are maintained at this level.
This option should be used very carefully. It is the methodology that allows Epicor Manifest to add
options used in the Maintenance | Ship Codes windows for mapping.
During Installation, the specific Carriers were imported via the Data Packager Import in the Reports/Tools menu. Currently DHL, Endicia(USPS), FedEx, OnTrac, UPS and UPSAPI are available in the Data Packager Import. All other Carriers (LTL) must be manually entered.
If using LTL Rate shopping functionality, See below section for entering LTL information on the Service tab.
If you are licensed for a specific carrier and it is NOT listed, contact your Epicor Manifest consultant.
This Help information is in 2 Sections.
The first Section is for PARCEL.
The second Section is for LTL.
CTS
PARCEL EXAMPLE FOLLOWS. SEE BELOW FOR LTL EXAMPLE.
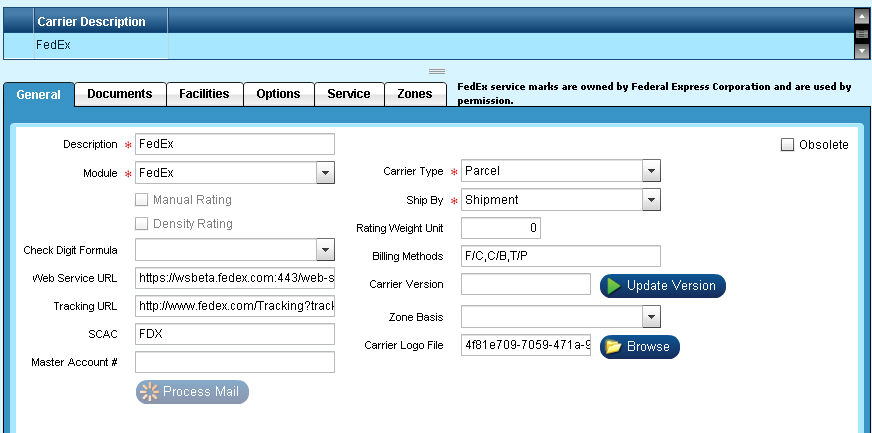
Description:
User defined Description of Carrier.
Module:
This drop down is used to define the specific IOC module for the carrier. This is required in order for the carrier to be saved.
-DHL API
-Endicia
-FedEx
-Generic
-UPS Shipping API
Manual Rating:
This flag is used for LTL Carriers. See below section for entering LTL information.
Density Rating:
This flag is used for LTL Carriers. See below section for entering LTL information.
Check Digit Formula:
This flag is used for LTL Carriers. See below section for entering LTL information.
Web Service URL:
This field is used to define the actual URL used for the Web Service (if applicable).
If the Carrier uses a Web Service URL, make sure the appropriate test or production site is listed depending on the sites status.
Tracking URL:
This field is used to define the URL with a tracking number embedded to redirect a user to the carriers website in context of the tracking number.
SCAC:
This field defines the optional SCAC code for the carrier.
Master Account #:
This field is used to determine the Master Account Number for the Carrier. This is applicable on some carriers. If the individual facility account numbers reference a Master account number, enter it here. Contact your Epicor Manifest Edition Consultant for more information.
Carrier Type:
This drop down is used to define the Carrier Type for the carrier.
-Parcel (if selected, select Container below)
-Truck (if selected, select Shipment below)
Ship By:
This drop down is used to define the Ship By for the carrier.
-Container (if selected, select Parcel above)
-Shipment (if selected, select Truck above)
Rating Unit Weight:
Not currently used in Epicor Manifest Edition.
Billing Methods:
The billing methods are listed for each Carrier in a comma separated list.
Prepay and Prepay & Add are valid for all carriers, so this comma separated list only shows additional billing methods for that carrier.
Only the billing methods in that list plus prepay and prepay & add are valid for this Carrier.
These codes are imported as Miscellaneous Codes | BillingMethod during the Reports/Tools | Data Packager Import | 1_MiscCodeGroups.
Valid Billing methods:
C/B = Consignee Billing
C/F = Cost and Freight
F/C = Recipient
F/D = Shipping, Duty & Tax
FOB = Free On Board
G/C = Collect (Not for COD)
P/P = Prepay
SDV = Delivery Duty Paid
T/P = Third Party
T/P F/D = Third Party Freight, Duty & Tax
T/P SDV = Third Party Freight Deliver Duty Paid
Carrier Version:
Not currently used in Epicor Manifest Edition.
Zone Basis:
This field is used for LTL Carriers to define the Manual Rating basis. See LTL Example for further discussion. Not used in Parcel setup.
Carrier Logo File:
This field is used to define the location of the carrier logo image used on the shipment screen.
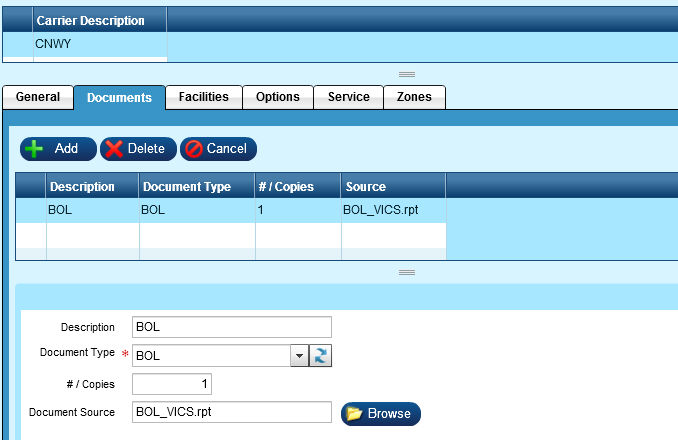
The Documents tab on the Carriers screen is where carrier specific reports and labels will be setup. This will be used for Manifest Reports, UPS Power of Attorney, Hazmat forms etc. If the user would like to print different report templates for each carrier’s manifest report then the rpt templates would be assigned to the carrier in this screen. If you are using the same report template for all carrier’s manifest reports, then that template can simply be setup in the Document Manager screen with a printer and # of copies assigned to each Facility in Workstations | Documents.
The Document Type triggers when the document will print, but there is no Output Type on this page. The printer information will come from the document type that is included at Workstations – Documents.
If no Parcel carrier specific forms are required, no documents need to be set up. See below for LTL setups.
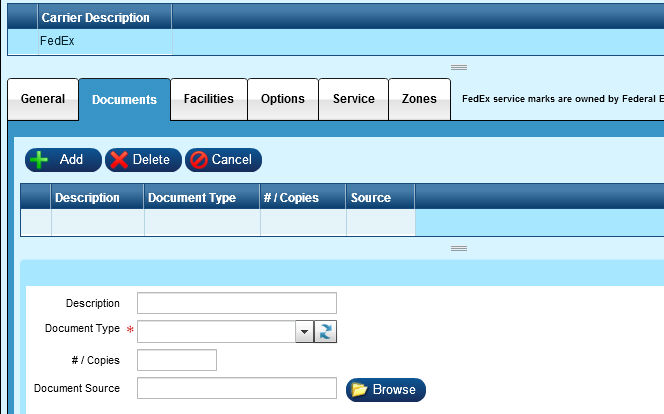
Description:
This field is used to define the extended name or description for the carrier document.
Document Type:
This drop down is used to select the type for the carrier document. This drop down is populated by Misc Codes.
These codes are imported as Miscellaneous Codes | Document Type during the Reports/Tools | Data Packager Import | 1_MiscCodeGroups and is specific to each carrier.
- BOL
- Carrier Form
- Carrier Label
- Hazmat IATA
- Hazmat Manifest
- Manifest Labels
- Manifest Reports
- Power Of Attorney
- UPS Returns Exchange Receipt
- UPS WorldEase Label
The options of this drop down are populated by Administration | Miscellaneous Codes | Addl Info screen.
NOTE: A carrier label is a shipping label. A carrier form is a form that could be sent back by a carrier i.e. a Hazmat form from FedEx. The two types allow the user to choose a laser printer for the form and label printer for the label.
# / Copies:
This field is used to determine the default number of copies for the document.
Workstation | Documents # and then Customers | Document of copies will override for this document type.
Source:
This field is used define the specific file location for the carrier document.
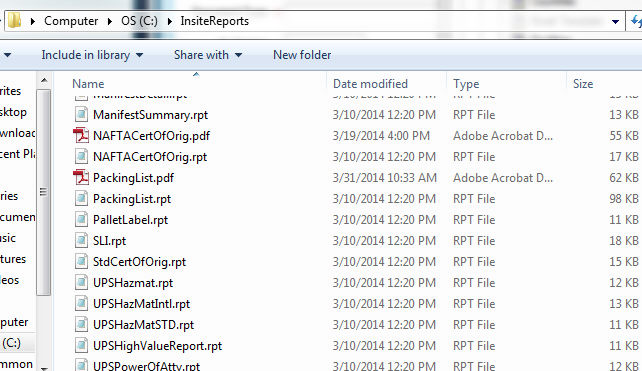
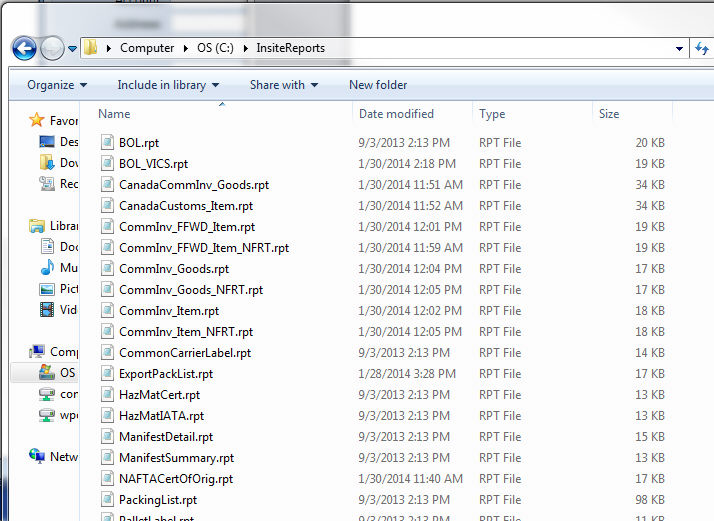
The Document Source is where you will browse for Crystal Reports .rpt templates. Typically in C:\Reports. If unable to locate, the Administrator | ReportFileDirectory entry will identify the directory.
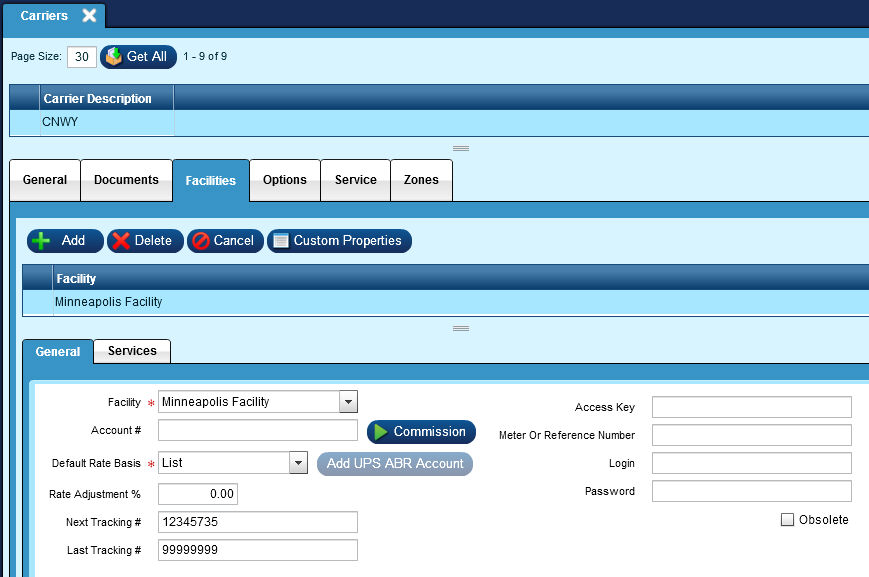
Setup each facility with the appropriate account information for each carrier. This is where you will commission the accounts to retrieve the Meter or Reference Number, Access Key and Password.

Parcel | Facilities | General Tab
Facility:
This drop down is used to identify the facility the displayed carrier information is for.
Account #:
This field is used to define the carrier specific account number for this facility.
Default Rate Basis:
This field is used to define if the Default Rate Basis.
This field is not available if manually rated (i.e. LTL).
Default Rate Basis:
This field is used to define the Default Rate Basis for the carrier.
FedEx:
Customer = The Customers Negotiated Rate.
List = The published rates for the carrier.
UPS:
Customer = The Customers Negotiated Rate.
List = The published rates for the carrier.
USPS:
Customer = The Customers Negotiated Rate is the ONLY rate available to USPS.
After selecting The Default Rate Basis; save your facility and then click “Commission”.
At this time a Web Service call will be sent to the Carrier which will return the appropriate credentials.
Save your facility once more.
Rate Adjustment %:
Define a positive or negative percentage in which to adjust the returned rate. This % rate is the default for ALL Services for the Carrier if there are no additional entries in the Service Tab. (See Below)
Next Tracking #:
Enter the next LTL tracking number or tracking number base for the carrier. See below for LTL setup.
Last Tracking #:
Enter the last possible LTL tracking number or tracking number base for the carrier. See below for LTL setup.
Access Key:
The is the access key required for connecting to this Carrier.
Meter or Reference Number:
This information is used to connect to the specific Carrier.
Login:
This information is used for commissioning the specific Carrier.
Password:
This information is used for commissioning the specific Carrier.
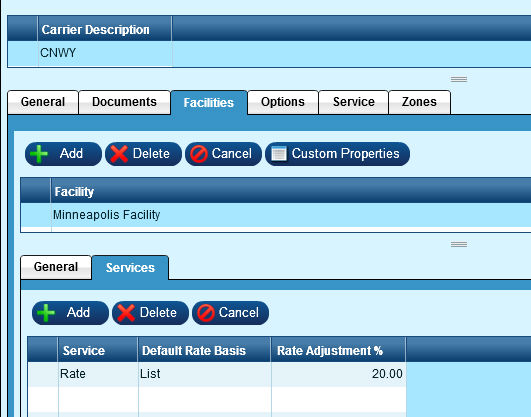
Parcel | Facilities | Services Tab
Use this tab to assess additional % charges to specific Carrier Services.
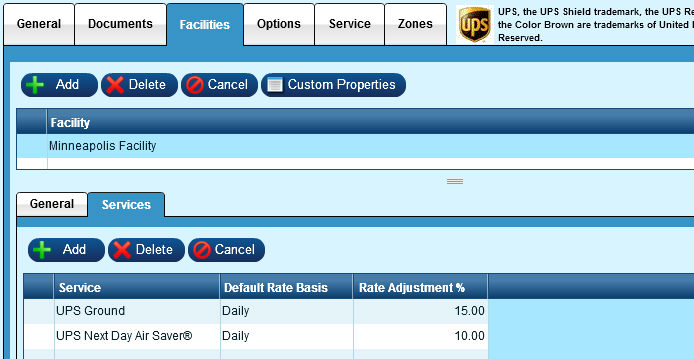
Service:
Identifies the specific Service that you wish to adjust the Shipping rate for.
Default Rate Basis:
This field is currently not used. The rate basis will be from the Facilities | General Tab.
Rate Adjustment:
Enter a positive or negative percentage in which to adjust the returned rate for the specific Service selected. This value overrides the Carrier/Facility value and is added to any charges from the Shipping Charges Scheme.
This tab describes the all of available options for the specific Carrier. Based on this information the Service tab is used to assign a specific Option to a specific Service. This list is initially installed during the setup of Epicor Ship Manifest Edition via the Data Packager. No maintenance should be required for this tab.

Service Description:
This is the Option offered by the carrier.
Parent Option:
This drop down is used to link a sub option to a parent option.
Sequence:
For a Parent Option, this field is used to determine the order the option displays in the Ship Codes screen. For a Child Option, this field is used to define the order in which child options are presented.
Option Level:
This value identifies the case the Option will apply to. NOTE: Child Option must reflect Parent Option Values.
- Shipment
- Container
- Movement
Carrier Code:
This field is optional and allows the system to identify this specific option for the carrier.
Value Type:
This drop down is used to select values/labels used for the Option.
Value Format:
This field is context sensitive to the value type.
Charge Base:
- Flat
- Per Container
- Per Weight Unit
- Per 100 Weight Units
- PctOfFreight
- None
Charge Amount:
This optional field is used to define the rate to be charged for this specific option if applicable. This is only applicable if manually rated.
Element Name:
This field is used for web service calls and UPS PLD creation, and helps define the section name when constructing calls.
This tab us used to assign specific information to Service offered by a Carrier.
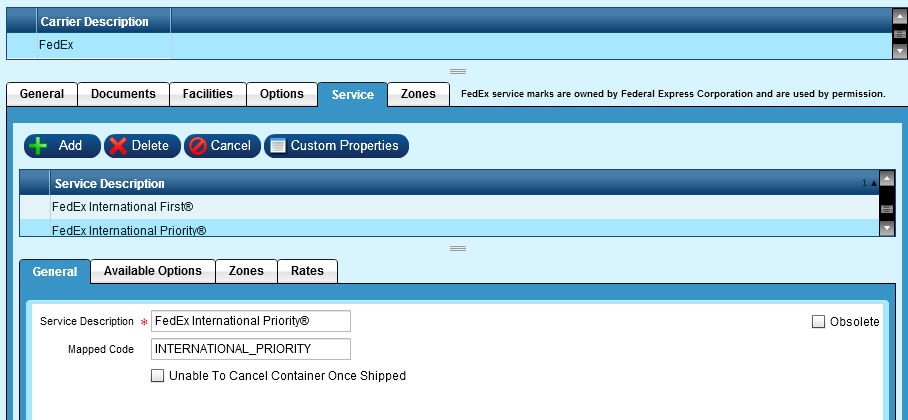
Parcel | Service | General Tab:
Service Description:
This field is used to define the name/extended description of the service.
Mapped Code:
This field is used by carriers to identify the specific Service being used.
Unable to Cancel Container once shipped:
Not currently used in Epicor Manifest Application.
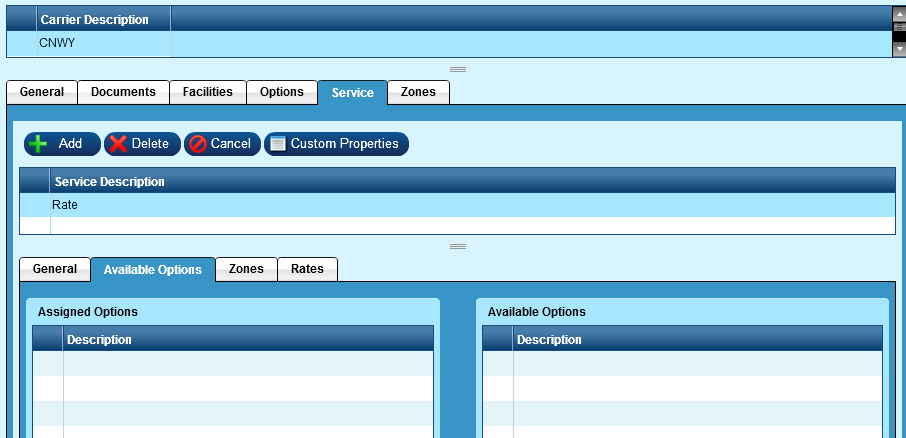
Parcel | Service | Available Options Tab:
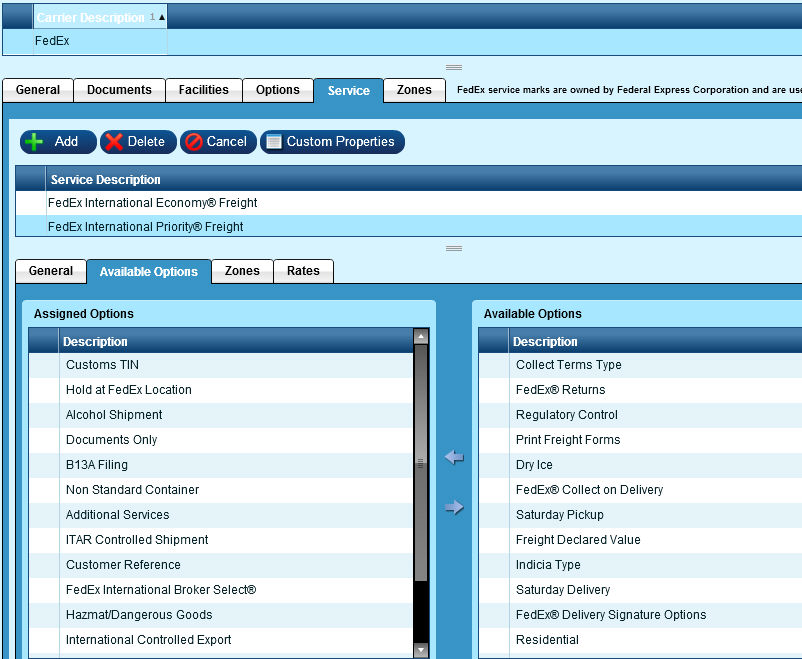
Assigned Options:
This table is used to show which Carrier options are currently assigned to the selected service.
Available Options:
This table is used to show which carrier options are available for the selected service.
Parcel | Service | Zones Tab:
This tab is NOT used for Parcel it is used for LTL ONLY. See LTL Section below for setups.
Parcel | Service | Rates Tab:
This tab is NOT used for Parcel it is used for LTL ONLY. See LTL Section below for setups.
Zone tab is NOT currently used in Epicor Manifest Application.
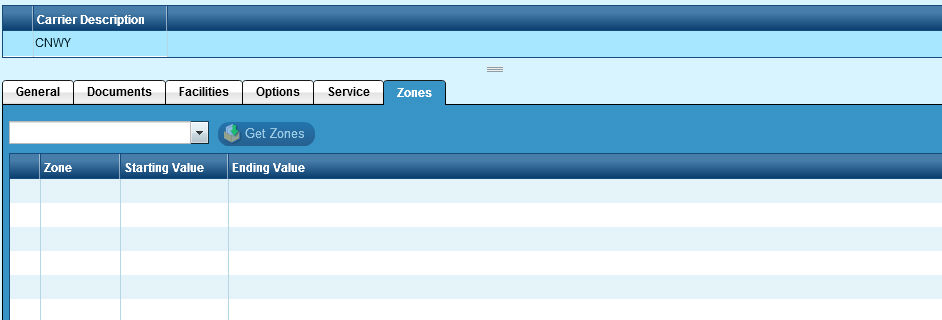
Please contact you Epicor Manifest Application Consultant.
TEST ACCOUNT:
On the Administration | Carriers | General tab for FedEx set the Web Server URL to https://wsbeta.fedex.com:443/web-services/. This allows your FedEx account to be registered on the TEST site.
PRODUCTION ACCOUNT:
On the Administration | Carriers | General tab for FedEx set the Web Server URL to https://ws.fedex.com:443/web-services/. This allows your FedEx account to be registered on the PRODUCTION site.
After entering the desired URL, use the Facilities tab to enter the Account Number. Once entered, click on the Commission button. This will execute the actual commissioning.
Before beginning this process verify information in the Administration | Company screen and Administration | Miscellaneous Codes | Languages screen and Administration | Users screen making sure ALL fields that are used in the initial UPS registration request are complete. Specifically Company - Company URL, Miscellaneous Language has EN - Addl Info ENG and Users - Language EN.
NOTE: Facilities Tab information MUST be setup prior to the initial registration process.
You will need a recent (last 30 days) UPS invoice that matches each Facility’s UPS account #.
User must have set up the Facility Record and log onto a workstation assigned to that Facility for the Facility being Commissioned.
User MUST NOT be insiteadmin.
NOTE: The initial registration is done on the LIVE UPS site. Once registered, you MUST change the UPS URL to the test site. This is documented in the last step in this process.
On the Administration | Carriers | General tab for UPS set the Web Server URL to https://onlinetools.ups.com. This is required to register your UPS account on the live web site. Save the record after each step. You will need to change the URL to the test URL (https://wwwcie.ups.com) at the end of this procedure.
Enter the appropriate account number for UPS on EACH facilities Administration | Carriers | Facilities | General tab. Save the record after each step.
NOTE: For European Accounts (Sweden for example), do NOT enter the decimal or comma in the Account Number. Enter only the actual numbers.
Return to the Administration | Carriers | General Tab and Click Register UPS Shipper.
The following screen will appear. Scroll to the bottom and the “Accept” button will activate.
Click “Accept”
Clicking “Accept” sends a license and registration request to UPS with the Company/Facility information. If the request is successful, the following message will appear:

If NOT successful, see below error list.
You have now REGISTERED your Company record with UPS. You must now COMMISSION your Facility/Facilities.
Return to each Facilities Administration | Carriers | Facility tab, verifying the Account # information and click “Add UPS ABR Account”.
The following screen will appear. Enter the corresponding facility invoice information.
ALL fields are required to process the request.
Click Register and save the Carrier record when complete.
NOTE: Once Registration and Commission processes have been completed, if you need to process TEST shipments, change your Administration | Carriers | General UPS Carrier Web server URL back to the test site of https://wwwcie.ups.com. For LIVE shipments use the https://onlinetools.ups.com URL.

Common Error Messages:
Error: The Service Providers URL was not Specified.
The Company record does not have a 'Company URL' value.
OR
Data may be corrupt, re-import Data Packager for 7_Carrier_UPS.
OR
Verify the https://onlinetools.ups.com works in a browser.
OR
The Facility Tab has not been set up.

Error: Invalid Language Code in AccessLicenseProfile.
The Logged In user does not have a valid language code or the Miscellaneous EN Code does not have ENG in the Addl Info field.
Additional SQL Info:
dbo.Carrier:
CarrierModule
UserName
Password
AccessLicenseNumber
LTL EXAMPLE FOLLOWS.

Description:
User defined Description of Carrier.
Module:
This drop down is used to define the specific module for the carrier. This is required in order for the carrier to be saved.
LTL carriers should be entered as Generic.
Manual Rating:
This flag is used for LTL Carriers if importing rates from a flat file. If not checked, users must enter any freight charges being charged to the customer manually.
See below for flat file import instructions.
Density Rating:
This flag is used for LTL Carriers if using the density calculation to determine the BOL Class. If using the part records BOL class or using FAK for the BOL Class, do not check this box.
The calculation for determining BOL class by density is:
Density Level = (Weight / (Length X Width X Height) / 1728)).
Density Level Freight Class
Less than 1 400
1 but less than 2 300
2 but less than 4 250
4 but less than 6 150
6 but less than 8 125
8 but less than 10 100
10 but less than 12 92.5
12 but less than 15 85
15 but less than 22.5 70
22.5 but less than 30 65
Greater than 30 60
Examples:
1 Container
1 - 48X48X40 @ 450 pounds
(450 / ((48X48X40) / 1728)) = 8.4375
Freight Class 100
3 Containers
1 - 48X48X40 @ 400 pounds
1 - 40X40X40 @ 400 pounds
1 - 36X36X36 @ 400 pounds
(1200 / (((48X48X40)+(40X40X40)+(36X36X36)) / 1728)) = 10.22405
Freight Class 92.5
Check Digit Formula:
This pull down is used for LTL Carriers. If the LTL uses a check digit when assigning their PRO#'s, you will need to insure that the carriers check digit formula is available. This field is used in conjunction with the beginning and ending Tracking# from the Facilities Tab.
Currently there are 4 standard Check Digit Formulas available:
CCX requires 8 digits in the beginning and ending Tracking# on the Facilities Tab.
RDWY requires 9 digits in the beginning and ending Tracking# on the Facilities Tab.
USF requires 10 digits in the beginning and ending Tracking# on the Facilities Tab.
YRC requires 9 digits in the beginning and ending Tracking# on the Facilities Tab.
Web Service URL:
This field is used for Parcel Carriers. See Parcel Carrier section for setup.
Tracking URL:
This field is used for Parcel Carriers. See Parcel Carrier section for setup.
SCAC:
Enter the Standard Alpha Character Code used to identify this carrier. This code will print on the International Paperwork forms.
SCAC Code Examples:
YFSY – Yellow Freight
RDWY – Roadway Express
ABFS - ABF Freight System Inc
FDEG - FedEx FDCC - FedEx Custom Critical
FEXF - FedEx Freight
Master Account #:
This field may be used for Parcel Carriers. See Parcel Carrier section for setup.
Carrier Type:
This drop down is used to define the Carrier Type for the carrier.
-Truck
Ship By:
This drop down is used to define the Ship By for the carrier.
-Shipment
Rating Unit Weight:
Not currently used in Epicor Manifest Edition.
Billing Methods:
The billing methods are listed for each Carrier in a comma separated list.
Prepay and Prepay & Add are valid for all carriers, so this comma separated list only shows additional billing methods for that carrier.
Only the billing methods in that list plus prepay and prepay & add are valid for that Carrier.
These codes are imported as Miscellaneous Codes | BillingMethod during the Reports/Tools | Data Packager Import | 1_MiscCodeGroups.
Valid Billing methods:
C/B = Consignee Billing
C/F = Cost and Freight
F/C = Recipient
F/D = Shipping, Duty & Tax
FOB = Free On Board
G/C = Collect (Not for COD)
P/P = Prepay
SDV = Delivery Duty Paid
T/P = Third Party
T/P F/D = Third Party Freight, Duty & Tax
T/P SDV = Third Party Freight Deliver Duty Paid
Carrier Version:
Not currently used in Epicor Manifest Edition.
Zone Basis:
This field is used for LTL Carriers to define the Manual Rating basis.
- PostalCode
Carrier Logo File:
Not used for LTL.
The Documents tab on the Carriers screen is where carrier specific reports and labels will be setup. This will mostly be used for Manifest Reports, UPS Power of Attorney or BOL forms. If the user would like to print different report templates for each carrier’s manifest report then the rpt templates would be assigned to the carrier in this screen. If you are using the same report template for all carrier’s manifest reports, then that template can simply be setup in the Document Manager screen with a printer and # of copies assigned to each Facility in Workstations | Documents.
The Document Type triggers when the document will print, but there is no Output Type on this page. The printer information will come from the document type that is included at Workstations – Documents.
Description:
This field is used to define the extended name or description for the carrier document.
Document Type:
This drop down is used to select the type for the carrier document. This drop down is populated by Misc Codes.
These codes are imported as Miscellaneous Codes | Document Type during the Reports/Tools | Data Packager Import | 1_MiscCodeGroups and is specific to each carrier.
- BOL
- Carrier Label
The options of this drop down are populated by Administration | Miscellaneous Codes | Addl Info screen.
# / Copies:
This field is used to determine the default number of copies for the document.
Workstation | Documents # and then Customers | Document of copies will override for this document type.
Source:
This field is used define the specific file location for the carrier document.
The Document Source is where you will browse for Crystal Reports .rpt templates. Typically in C:\IReports. If unable to locate, the Administrator | ReportFileDirectory entry will identify the directory.
Setup each facility with the appropriate information for each carrier.
LTL | Facilities | General Tab:
Facility:
This drop down is used to select the facilities the carrier is authorized for. If the Facility is not in this list, the carrier cannot be used at that Facility.
Account #:
This field is informational only for LTL Carriers.
Default Rate Basis:
This pull down is used to define the Default Rate Basis. For LTL Carriers it is recommended 'List' is used.
-List
Rate Adjustment %:
Define a positive or negative percentage in which to adjust the returned rate.
Next Tracking #:
Enter the next LTL tracking number or tracking number base for the carrier.
NOTE: This is used in conjunction with the 'Check Digit Formula' from the General Tab.
Currently there are 4 standard Check Digit Formulas available. If the LTL uses a check digit when assigning their PRO#'s, you will need to insure that the carriers check digit formula is available.
CCX requires 8 digits in the beginning and ending Tracking# on the Facilities Tab.
RDWY requires 9 digits in the beginning and ending Tracking# on the Facilities Tab.
USF requires 10 digits in the beginning and ending Tracking# on the Facilities Tab.
YRC requires 9 digits in the beginning and ending Tracking# on the Facilities Tab.
Last Tracking #:
Enter the last possible LTL tracking number or tracking number base for the carrier.
Access Key:
Not used for LTL.
Meter or Reference Number:
Not used for LTL.
Login:
Not used for LTL.
Password:
Not used for LTL.
LTL | Facilities | Services Tab:
Use this tab to asses additional charges to specific Carrier Services.
Service:
Identify the specific Service that you wish to adjust the Shipping rate for.
Default Rate Basis:
This field is currently not used. The rate basis will be from the Facilities | General Tab.
Rate Adjustment:
Enter a positive or negative percentage in which to adjust the returned rate for the specific Service selected. This value overrides the Carrier/Facility value and is added to any charges from the Shipping Charges Scheme.
This Tab not used not used for LTL.
This tab is used to assign specific information offered by a Carrier. For LTL this information will be the rates for that LTL.

LTL | Service | General Tab:
Service Description:
This field is used to define the name/extended description of the service.
Mapped Code:
This field is used by carriers to identify the specific Service being used.
Unable to Cancel Container once shipped:
Not currently used in Epicor Manifest Edition.
LTL | Service | Available Options Tab:
This tab Is not used for LTL Carriers.
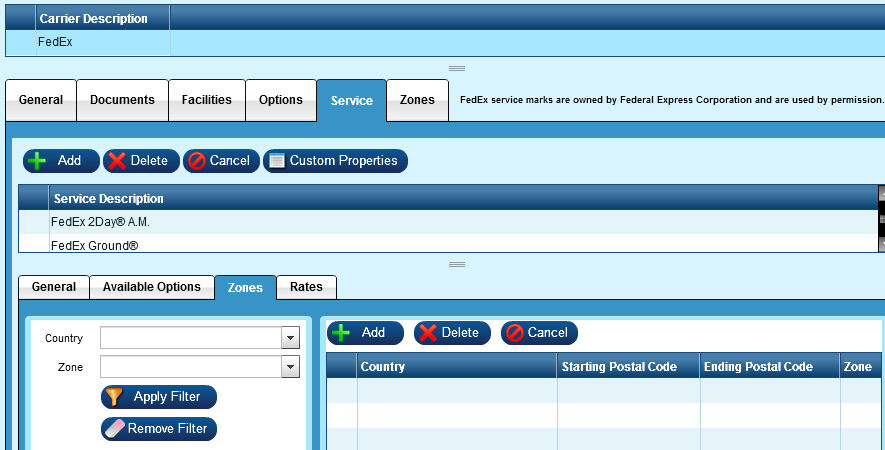
LTL | Service | Zones Tab:
This tab is used when LTL Rates are being imported. This will be used with LTL Carriers only and typically will be populated with a flat file.
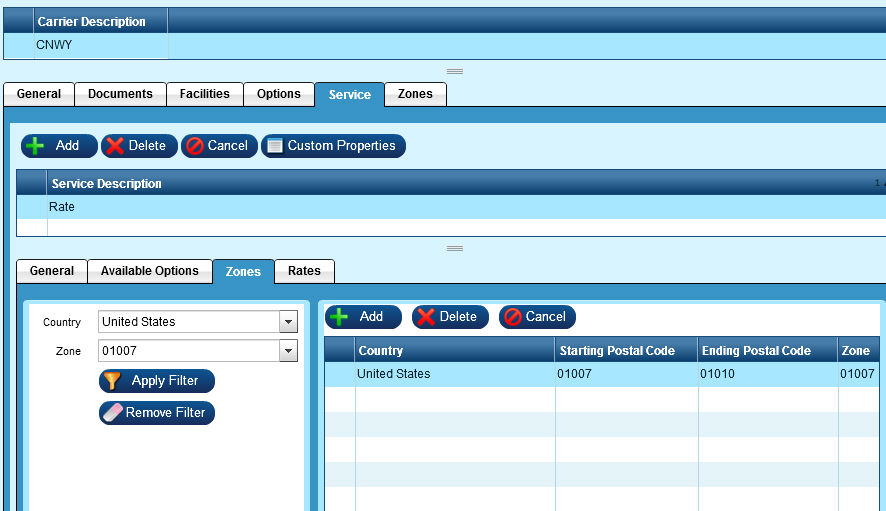
Country:
Select the country the zones will be defined for.
Zone:
The unique zone for the postal code range.
Starting Postal Code:
This field reflects the starting postal code, district, or country that will be used for rating.
Ending Postal Code:
This field reflects the ending postal code, district, or country that will be used for rating.
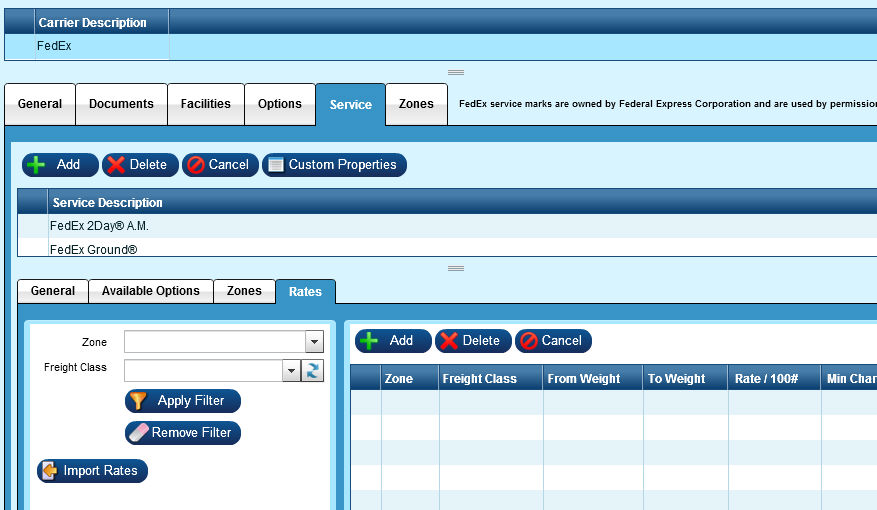
LTL | Service | Rates Tab:
Use the Import Rates button to import LTL .csv file rates. See below for import procedure.
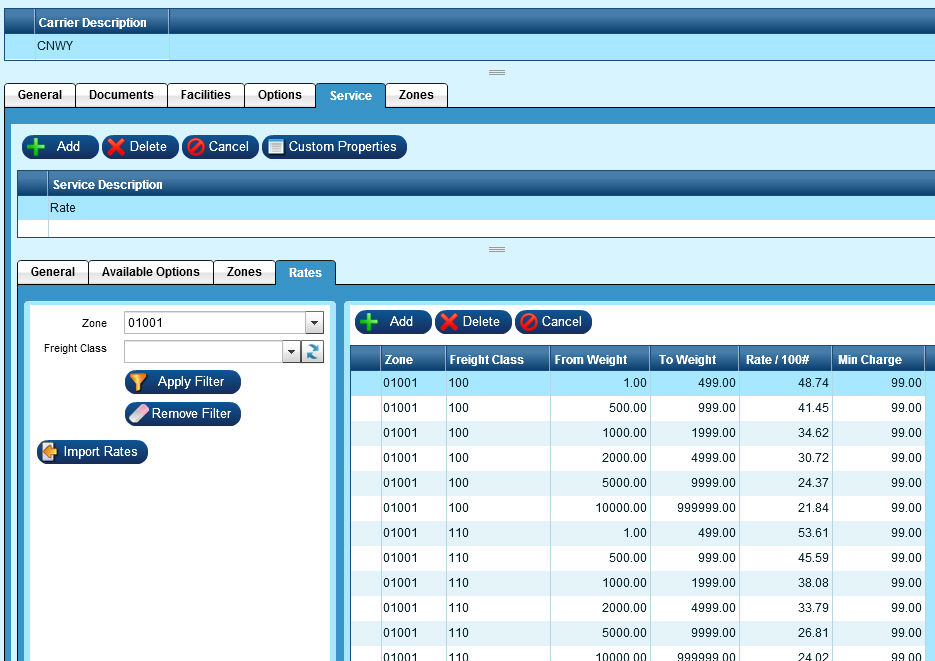
Zone:
Identifies the zone rate values correspond to. This zone must match a zone in the zone table.
Freight Class:
NMFC Freight Class rate values correspond to.
From Weight:
Minimum weight for this rate value.
To Weight:
Maximum weight for this rate value.
Rate / 100#:
Value charged per 100 pounds.
Min Charge:
The minimum charge for this freight weight range.
Use this icon to import rates for specific LTL carriers.
Select the Import Rates icon.
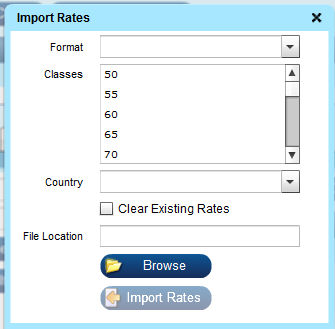
The Import Rates window will open.
Format:
Select the Import Type drop-down arrow to select the type of file you will be using for the Ship Code. Epicor Manifest Edition recommends Insite By Zip. See below for import structure information.
- Czar Lite
- Czar Lite Flat
- Insite By Zip
- Insite By State
Classes:
Highlight all of the Freight Classes that you will be loading data for from your carrier.
Note: You must set up Freight Classes in Maintenance | BOL Classes prior to importing your carrier’s file.
Country:
Select the country the import records relate to.
Clear Existing Rates:
Check this box if your import should over write any existing records.
File Location:
Browse to find the file you wish to import.
INFORMATION REGARDING IMPORT FILE STRUCTURE:
To use the Epicor Manifest Edition formatted imports, the data must be in a comma-separated file and the columns must match up exactly to the definition below.
Most of the data received from trucking carriers will be available to call up in Microsoft Excel. Our suggestion is to re-organize the spreadsheet within Excel – removing or adding columns, moving columns to match the format and/or conditioning any data that may be needed. Once the data is in the proper format, save the spreadsheet as a CSV file.
Excel will prompt you about formatting issues as you do this as shown below:
Simply click the Yes button to accept and create the file – the .csv version of the rating table will be the one that is imported.
ZIPCODE TABLE FORMATTING:
NOTE: You need to remove any row header lines in the file. If you have not deleted any header lines you will get the following error message:

Column Field Description
1 - DestZipLow Lowest zip code in the destination’s range of zip codes
2 - DestZipHi Highest zip code in the destination’s range of zip codes
3 - Class This is freight class that the rates are tied to
4 - Min Minimum charge for this destination
5 - L5C Rate per 100#, < 500 lbs
6 - M5C Rate per 100#, 501 – 999 lbs
7 - M1M Rate per 100#, 1000-1999 lbs
8 - M2M Rate per 100#, 2000-4999 lbs
9 - M5M Rate per 100#, 5000-9999 lbs
10 - M10M Rate per 100#, > 10,000 lbs
STATE TABLE FORMATTING:
NOTE: You need to remove any header lines in the file. If you have not deleted any header lines you will get the following error message:
Column Field Description
1 - State Valid 2-character US state code
2 - Class This is freight class that the rates are tied to
3 - Min Minimum charge for this destination
4 - L5C Rate per 100#, < 500 lbs
5 - M5C Rate per 100#, 501 – 999 lbs
6 - M1M Rate per 100#, 1000-1999 lbs
7 - M2M Rate per 100#, 2000-4999 lbs
8 - M10M Rate per 100#, 5000-9999 lbs
9 - M5M Rate per 100#, > 10,000 lbs
Zone tab is NOT currently used in Epicor Manifest Application.